The first step is to decide what information best characterizes the X axis for the plot. This will depend on the source of your data and on whatever preliminary processing may have been done. Use the Time/identification field dropdown to specify how MaxIm DL should derive this information. This control should be set at the beginning of analysis since changing it resets the photometry tool. The available choices are:
Date/time from FITS. This is the most common setting. By convention, the time associated with a photometry image is that of the midpoint of the exposure. MaxIm DL obtains this by preference from the MIDPOINT key of the FITS header. If this key is not present, it computes the midpoint by adding one-half the duration of the exposure to the start time. Duration is provided by any of the keys EXPTIME, EXPOSURE, or FEXPTIME, while start time comes from the DATE-OBS key, supplemented by TIME-OBS or UT if no hr:min:sec information is present in DATE-OBS. This setting works with images captured by MaxIm DL and many other camera control packages. Images appear in the Image list in chronological order; those lacking sufficient information to derive a time are omitted from the list.
File Timestamp. Images not containing FITS information, but which have a valid timestamp on the file itself, can be processed using this setting. MaxIm DL takes the time from the Windows folder file modification date.
Sequence Number. In the absence of any other useful information, images can simply be assigned a "sequence number", i.e. is a number starting at 1 and counting up for each subsequent image in the Image list, listed in alphabetical order. Excluded images, described below, are also allotted a sequence number. When using this option, it is recommended that you close all images except for the ones being analyzed. You will also want to record the correspondence between image names and sequence numbers.
Arbitrary FITS key. When this option is picked, the Time/identification field displays [Enter FITS key] and is enabled for input. Type the name of any FITS keyword present in your image headers which contains a value that can be interpreted as a date/time. String-valued keys containing slash- or hyphen-delimited year-month-day and colon-delimited hr:min:sec values are interpreted correctly. A time in hours, minutes and seconds without a date is arbitrarily assigned a date of 2000 Jan 01. Integer- and real-valued FITS keywords are used directly as the X axis data. Images lacking the specified keyword are omitted from the Image list.
In all cases, the "time" value associated with the currently selected file is displayed in the read-only Time of Image edit box. When Date/time from FITS is selected, (Mid-exp.) is appended to the caption to remind you that the time shown is the middle of the exposure.

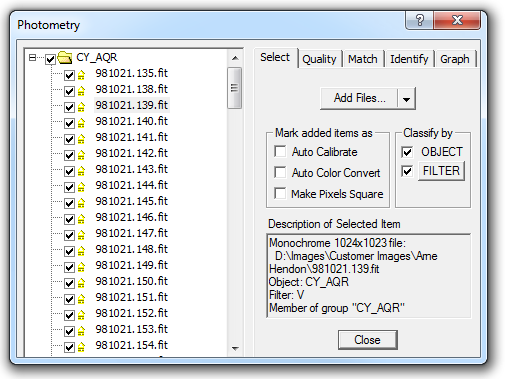
Now we need to set various options. Typically the Auto Calibrate command is turned on, so that images can be calibrated as they are measured. Note: this should be set before adding images. If you need to change this setting after loading images, use the right-click menu on the tree view.
Next, select the images to analyze. The top button has a drop-down arrow to select the mode:
Add Images... - use images already loaded into MaxIm DL (not recommended due to large memory requirements)
Add Files... - select individual files from disk
Add Folder - select a folder; MaxIm DL will automatically scan the folder for images and sort them. Include Subfolders can be checked to import images from multiple subfolders
Import CSV... - reload previously analyzed measurement data without loading images
Remove - click on an item in the tree view at left, and click Remove to delete it from the list.
You can make various changes in the tree view itself. You can drag images between the different groups. Right-click to perform the following commands:
Set Object Name - set the object name for the group.
Rename Group - set the name of the group.
New Group - to manually create a new image group.
Auto Calibrate - to change the Auto Calibration settings for a group.
Auto Display - when set, clicking on an image in the tree view will cause it to be displayed.
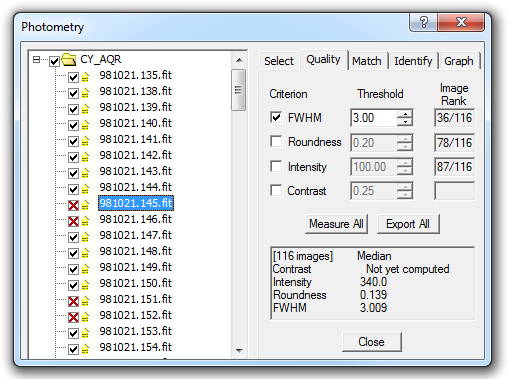
Measure Quality - measure the quality of an image (see Quality tab, below).
Reference Image - set the reference image. This is used for recognizing the objects in each image. Normally you can use the default; however if the default image is of poor quality you may wish to manually select a better one.
Recompute Alignment - recompute the image alignment. The image alignment is used to determine which stars match in the various images.
Reset Alignment - reset the image alignment.
Sort By - adjust the sorting in the tree view. Options are Name, Date/time, FWHM, Roundness, Intensity, and Contrast.
Select All - select all images
Uncheck Items - uncheck the selected items. This is useful when you need to remove multiple bad images from the analysis. You can select multiple images using SHIFT or CTRL and the mouse.
Remove Items - remove the selected items.
Info Tips - turns on/off the yellow tip boxes that appear when you wave the mouse over controls.
