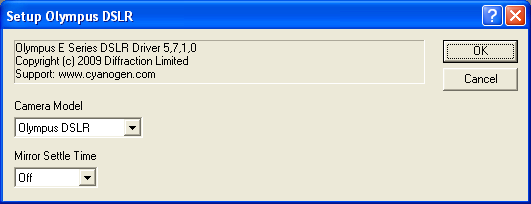
This plug-in driver is available as part of the Obsolete Driver Pack. The driver is only compatible with Windows XP.
For this plug-in, please select Olympus DSLR on the Setup tab.
Important: To use this camera you must install the Olympus drivers, which are included in C:\Program Files\Diffraction Limited\MaxIm DL V6\Olympus.

Important: Please read this entire section before attempting to use Olympus cameras. Due to various camera quirks, the following notes must be followed for the driver to operate:
In some cases you may need to upgrade the camera’s firmware or software drivers before it will work properly via computer control. Please consult the manufacturer’s web site for updates.
Either plug in the camera to an AC power converter or have fresh batteries and turn on the Auto Power Off setting to Off so the camera won’t shut down. Otherwise the camera will unexpectedly stop working after it is idle for a period of time.
Set the camera mode to PC Connect for the E-1 and E-300. For all other models set it to Remote Control.
Maximum exposure time is 8 minutes.
The USB cable must be connected to the camera.
This plug-in currently supports the Olympus E-System camera models including the E-1, E-300, E-330, E-400, E-410, E-500 and E-510 using the supplied USB connections. Long exposure bulb cables are not required for these cameras. The camera's bulb mode is used when exposures are longer than 8 seconds.
The user interface remains active at all times, except during image download. This means you may cancel the exposure while it is in progress; however, due to the design of the camera the image must still be downloaded and discarded. During this time the camera status will show Flushing.
Mirror Settle Time
When set to None, the shutter opens immediately after the mirror flips up. If you enter a delay time, there will be a delay before the shutter opens, to allow time for vibrations induced by the mirror motion to settle out.
Readout Mode
Through the Expose tab you can set the Readout Mode, as follows:
RAW Monochrome for RAW (bayer-encoded) 12-bit or 14-bit images (saves as FITS)
RAW Color for RAW 12-bit or 14-bit color converted images (saves as FITS)
JPEG Monochrome for 8-bit JPEG compressed download in monochrome (saves as FITS)
JPEG Color for 8-bit JPEG compressed download in color (saves as FITS)
RAW to Hard Drive for RAW images downloaded directly to the hard disk (saves as .orf), to the folder specified by Set Image Save Path in the Options menu of the Camera Control Expose tab.
For the best quality imaging, select Readout Mode to RAW Monochrome and set Binning to 1x1. In this mode, the images are initially monochrome but have color information encoded in them by way of a Bayer matrix. Although color is not immediately visible, this mode provides higher bit depth (12 bits instead of 8), and dark frame subtraction will be superior on RAW images. The typical sequence is to acquire images, subtract dark frame, convert color, and then stack. Note that this mode is not suitable for use with the focusing tools.
If you set Readout Mode to RAW Color and Binning to 1x1, then the images appear immediately in color. This is not optimal for dark frame subtraction, though, so the RAW Monochrome mode is preferred unless you set the camera to subtract dark frames internally. Some camera models have the capability of taking two frames for every exposure; one with the shutter closed and one with the shutter open; the images are automatically subtracted prior to download. If you activate this mode, then the images take twice as long to collect, but they are already dark subtracted. This feature is best used with RAW Color or JPEG Color, since it eliminates the color conversion step.
Focusing can be performed in any mode except for RAW Monochrome, Binning 1x1. In that mode, the Bayer matrix is present, and this will interfere with measurements. Focusing can be performed in any other mode, or with Binning 2x2.
Please note that Binning only improves the download speed for JPEG download modes.
ISO
The desired ISO setting can be configured from 100 through 3200. This is actually the camera gain; a low setting provides good quality but is less sensitive. A high setting provides the highest setting but also produces the noisiest images. This setting can adjusted on the Expose tab or Sequence tab.
Availability of this feature depends on Product Level.