![]() If you have not already done so, open the DG_HaleBopp.fits
file in the Samples directory. (For help on opening files see the Open
a File Tutorial).
If you have not already done so, open the DG_HaleBopp.fits
file in the Samples directory. (For help on opening files see the Open
a File Tutorial).
![]() Make sure the Screen Stretch window
is visible. If it is not, click
the Toggle Screen Stretch button
on the Toolbar.
Make sure the Screen Stretch window
is visible. If it is not, click
the Toggle Screen Stretch button
on the Toolbar.
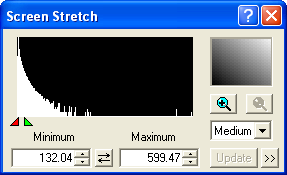
The Screen Stretch window should look something like this:

The large histogram graph at upper left shows the relative number of pixels (vertical scale) at each intensity level (horizontal scale) in the image. The graph shows that most of the pixels are grouped on the left (dark) side of the histogram, and that the number of pixels drops off rapidly at brighter levels (right side).
The red caret (pointer) indicates the brightness level that is displayed as black on the screen. The brightness level of the red caret is indicated in Minimum. Similarly, the green caret indicates the brightness level that is displayed as white on the screen; this brightness level is indicated in Maximum.
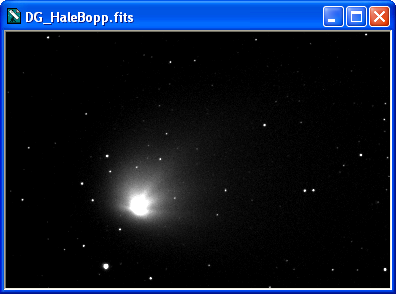
Click on the drop-down list with the mouse and select Low. The image should change as follows:

The Low Stretch setting makes the image darker, allowing details in the brighter part of the comet to be visible. Try selecting the High Stretch setting and see what happens. Each of the three views reveals different parts of the comet. Note that selecting the stretch mode has no effect on how the image is stored; it only changes how it is displayed.
Quick Stretch
The fastest way to adjust the image brightness and contrast is to use the Quick Stretch control. This method gives instant updates as the mouse is dragged, and is particularly fast for monochrome images. The Quick Stretch control is the shaded box at the upper right of the Screen Stretch dialog box.

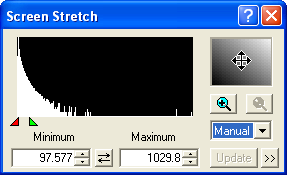
Point the mouse at the Quick Stretch box and press and hold the left mouse button down. The mouse cursor changes to a "four arrows" shape. You can now adjust the image contrast and brightness as follows:
Move the mouse upwards to increase brightness
Move the mouse downwards to decrease brightness
Move the mouse right to increase contrast
Move the mouse left to decrease contrast
This function is also available without using the Screen Stretch window. Simply point the mouse at any image window. Hold down the shift key, then press and hold the left mouse button down. You can now make the same adjustments described above.
Manual Controls
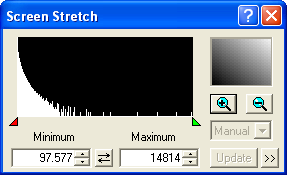
Adjustments can also be made by adjusting the position of the pointers along the bottom of the histogram. Click and drag the Green caret (pointer) under the histogram image. This controls the brightness level that corresponds to full white on the screen; i.e., the maximum output level. Drag it right or left; when it is dropped, the image will update with the new settings. The Maximum field also updates to show you the corresponding brightness level in the image.
The Red caret controls the black or background level. Try adjusting it and see what the effect is. The Minimum field updates as you adjust the setting.

Placing the Red and Green carets close together produces a high contrast; conversely placing them far apart produces a low contrast. Reversing the positions of the two carets (Red to the right of Green) will produce a negative image.
When moving the carets with the mouse, experiment with holding down either the SHIFT or CTRL keys. The SHIFT key makes the carets move together, keeping the contrast constant but changing the brightness. The CTRL key makes the carets move in opposite directions.
You can also modify the Maximum and Minimum fields directly by typing in a new number and then pressing Enter. Note: if you type in the numeric entry fields, you must press Enter or click Update for the new value to take effect.
Notes
Remember, these functions only affect the image display. They have no effect on the image buffer itself. This allows you to conveniently change the stretch at any time without affecting any later image processing operations.
Tip: The Screen Stretch window is normally left turned on, and can be accessed at almost any time – even while a dialog box is active. When a dialog box is active, you can adjust the stretch of the Preview Image using the Screen Stretch window. In most cases, if the Preview button is depressed, the Preview Image has separate stretch settings. You can stretch it by clicking on the dialog box, then adjusting the Screen Stretch window settings.
If the Preview button is not depressed, the Preview Image and main image window share the same stretch settings.